- Home
- Compare Systems
- Cheap Systems
- Free Quotes
- DIY Systems
- Hardwired Systems
- Wireless Systems
- Smoke Detectors
- Medical Alarms
- Alarm Monitoring
- Cameras & Video
- Ademco
- ADT Security
- Brinks Security
- Broadview
- DSC Security
- FBI Alarms
- GE Security
- Honeywell
- Link Interactive
- Monitronics
- Moose
- Napco
- Protection 1
- Radionics
- Simplisafe
- Alarm Manuals
- Alarm System Parts
- Alarm Tools
- Troubleshooting
- FAQ
- Glossary
- Sitemap
- About Me
- Contact Me
Alarm Switch Troubleshooting
Finding and Fixing
Lightning Damaged
Alarm Contacts
Most magnetic switch troubleshooting jobs involve fixing hardwire contacts that are an open circuit, either all of the time or intermittently. This page deals with the opposite condition: A switch that is always closed, regardless of the position of the door or window where it’s installed.
Although alarm system contacts that have failed closed or are welded closed are much more rare than the open variety, they do happen. If you notice a door or window that doesn’t seem to “trip” the alarm when it’s opened, this page is for you.
For help with always-open switches and faulted zone problems, see my main “Burglar Alarm System Troubleshooting” page.
For alarm contacts that are intermittent and/or falsing, see “How to Troubleshoot Alarm Panel Wiring.”
Causes of Welded Alarm Switches
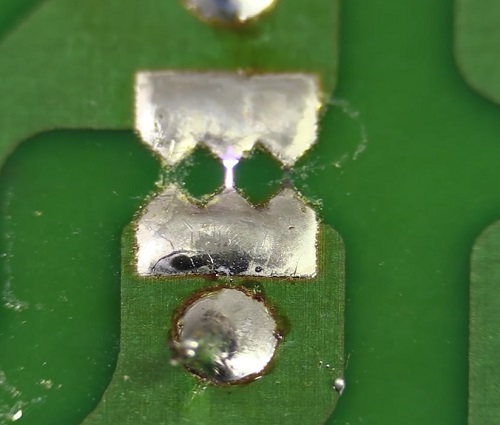
The most common cause for an always-closed alarm contact is a nearby lightning strike. While a switch may occasionally fail in the closed position due to wear and tear, damage by lightning is most often the cause.
Lightning doesn’t have to strike a house directly to cause this damage. In fact, I've found welded contacts in many homes where the owner had no idea anything was wrong (another good reason to test your system regularly).
When lightning discharges, either from cloud-to-ground or
cloud-to-cloud, an enormous amount of electrical energy is released.
This huge current generates an electromagnetic field that induces
voltage and current in any nearby conductors, including house electrical
and alarm system wiring of all types.
These currents are often many times greater than the wiring and connected devices were ever designed for. Excess current can easily fry appliances and electronics, including alarm equipment.
The
hardwired magnetic contacts on the doors and windows aren’t nearly so
lucky. They are simple magnetic reed switches, connected directly to the
security alarm wiring with no means to prevent lightning damage. Any
large surge of current will flow directly through a closed contact, and
can easily heat it enough to weld it in the closed position.
In case you’re wondering, plugging the alarm system’s low-voltage transformer into a surge protector will not protect the switches, but it could help save the transformer and circuit board.
Lightning
hitting at a distance may not do any harm at all, while closer strikes
may be arrested by the protective devices on the alarm circuit board.
Lightning that occurs very nearby can blast through even the
best protective measures and vaporize components. Depending on the
extent of the damage, the entire system may need to be replaced (more on
that later.)
For
now, let’s assume that you don’t have smoke billowing from your
alarm panel, but you do have a switch that doesn’t seem to be
tripping the keypad chime or display when opened.
Welded Switch Troubleshooting Guidelines
Verifying a Frozen or Welded Alarm Switch
While a switch may appear to be welded or unresponsive, it’s
a good idea to make sure. If several openings are tied to a single
zone, the zone will show faulted when any one of the openings is
faulted. This can make a switch appear to be unresponsive, when it’s
simply on a zone that’s already tripped by another opening.
A zone list is an important switch troubleshooting tool. This shows which doors, windows, motion detectors, and other sensors are tied to which panel zones.
Over time, we can lose track of exactly which zones connect to what.
Heck, I installed my entire system myself, but I can't remember every
zone location without the zone list!
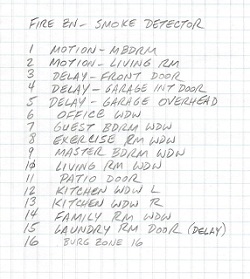 Alarm panel zone list on paper. Even a basic list like this one makes switch troubleshooting much easier.
If
you’re not very familiar with the zone layout of your alarm system,
check your Owner’s Manual for a zone list. It should show which door and
window openings are connected to each alarm panel zone number.
This
information may also be listed inside the main panel box lid. If your
system is monitored, contact your alarm monitoring company for a zone
list.
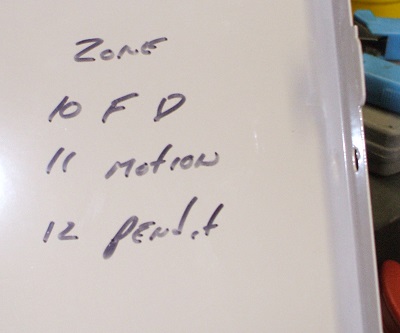 Zone list hastily written inside panel lid (Not my work). This is for an Ademco Vista 10SE using 3 of its available 6 zones (It was installed in asmall office suite)
 Zone 10 "F D" is Front Door
Zone 11 "Motion" is Motion Detector
Zone 12 "Pendit" is Wireless Pendant Transmitter, probably for use as a panic button
If you don’t have a
zone list, now may be a good time to make one. It’s easy to do, and will
come in handy for any future switch troubleshooting.
How to Make a Zone List
- Close all exterior windows and doors so that the keypad shows “Ready”
- Open each door and window, one by one, and check the keypad to see which zone is displayed as faulted/open
- Write down which zone is tripped by each opening. When you’ve checked every opening, you’ll have a complete zone list
- If opening a contact doesn’t kill the “ready” condition, that is a problem switch
After
you’ve verified your zones and you are sure a switch is not
showing up on the keypads when in the open position, move to the next
step.
You can download and print out a FREE copy of my Basic Alarm Zone List to use as a fill-in form to make this easier.
It has 28 lines for alarm zone information, including zone numbers, descriptions of protected areas, loop and serial numbers, and more.
Are you an alarm installer, and need a sheet to record system info for your customers?
Download a FREE copy of my Alarm Installation Record Sheet.
This has spaces to enter a homeowner or business name, address, phone numbers, and panel make and model details. The lower portion of the form is a shorter, 20-zone version of the Basic Alarm Zone List above.
Each of these PDF documents will print out as a single 8-1/2 x 11 page, and I created them both to work with any type of alarm panel - wireless, hardwired, or hybrid. Modify them as you like to suit your needs.
Freeing-Up Frozen Alarm Contacts
Begin your switch troubleshooting by locating some sort of tool you can use to tap on the problem
switch. The handle-end of a screwdriver works well. You can also use the
handle of a wooden spoon or a short wooden stick.
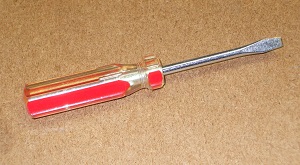 “High-tech” tool for breaking welded magnetic contacts loose
Next, turn on the system’s “Chime” or “Watch Tone” function. Most
all alarm systems have this feature, and it works as a great switch
troubleshooting tool. (If you don’t know how to activate the chime, or
if you’re not sure your system has this feature, click here for help
finding a user manual)
An alternative to the chime method is
to have a helper watch the keypad display, and call out when they notice
a zone fault. If your home is very large, or if the problem zone is far
from a keypad, you can communicate by cell phone.
Next, go to the alarm switch in question. Tap the problem switch lightly a few times with the your trusty screwdriver handle or other high-tech tool of choice. If success shines its bleary eye on you, there will be a chime tone or display change at the keypad as the switch opens.
If so, congratulations! You’ve freed up the switch. If only light tapping was needed to free it up, the switch was not strongly welded closed, and it has a good chance of being usable (at least in the short term.)
If light tapping
doesn’t work, tap progressively harder. The more current and heat
generated when the lightning hit, the stronger the weld is likely to be.
If more aggressive tapping eventually does free up the contact,
there was probably a significant amount of current that caused it to
weld. This means enough damage may have been done to cause the switch to
fail in the near future.
I usually don’t recommend brute force for any switch troubleshooting, due to the risk of possible damage. However, in this case it can’t do any harm.
If the switch IS welded enough to require heavy pounding to free it up, it needs to be replaced anyway.
If
the weld is very strong, no amount of beating on the switch
will free it up. In that case, the switch is hopelessly damaged and
should definitely be replaced. For help doing this, see the links at the
bottom of this page.
Follow-up to Frozen Switch Troubleshooting
How you proceed after initial switch troubleshooting is something of a
judgement call, and will depend on your circumstances. Lightning is
never good for any equipment. Even though everything may appear
to be working fine, there may be degraded components or hidden damage
that won’t surface until weeks or months in the future.
Some important things to consider:
Minor Switch Problems
If there are only one or two frozen switches affected and they free up when lightly tapped, you probably had a lightning strike that wasn’t too close to the house. Test all of the magnetic contacts by opening and closing them several times. If they seem to be working normally, make a note of the problem contacts and leave it inside the alarm panel box. Then go back to using the system as usual.
If
you ever have any further switch issues, check your switch troubleshooting notes. If one of
the previously welded switches is having a problem again, replace it. It
was likely damaged more than it was showing, and shouldn’t be trusted
in the long run.
More Severe Switch Problems
If you have several switches welded shut, or if you had to smack any
switches quite hard before they opened, you probably had a fairly close
lightning strike. Switches that have undergone this abuse are more
likely to fail prematurely. If there was no other damage to the system,
you may decide to take your chances, and simply replace any switches
that do fail.
If you found welded contacts and also had
damage to the main alarm panel or other electronics in the home
(computer, television, refrigerator, etc.), you should consider filing a
claim under your homeowners’ insurance policy. Depending on your policy
terms, it may cover the replacement value of the damaged items.
If you file a claim, your insurance company may require that you
have an alarm company check your system and complete a letter or form
stating that lightning was the cause of the damage.
In my experience, the insurance company may also insist that all of the magnetic contacts, and in fact all of the alarm equipment be replaced.
A word about hardwired versus wireless systems...
This page deals with lightning damage, which I have only seen in
hardwired security systems. Wireless systems are relatively immune to
this problem, barring a direct lightning strike on the home.
Does this mean you should avoid a hardwired system for fear of possible lightning damage?
Absolutely not. Lightning damage is extremely rare, compared to the
relatively common issues you would be likely to experience with a
wireless system. These include:
- False tamper alarms due to cracked and brittle transmitter covers
- Wireless reception problems due to interference and location Periodic required battery changes
The Bottom Line?
Always choose a hardwired system if wiring is possible and economically feasible. Hard wiring is, and likely always will be, the most reliable way to connect alarm components.
Do you have a lightning damaged alarm system, or an
older system that’s starting to have problems? If so, why not get a few
free alarm quotes?
Knowing how much a new system would cost will help you decide whether you should try to fix the old one or just replace it.
These quotes are absolutely free!
Product Links
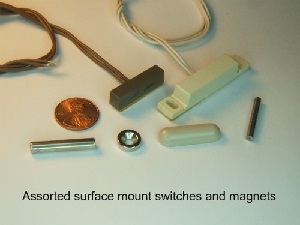
Surface-mount switches
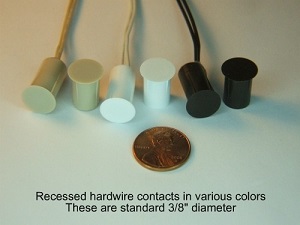
Recessed switches
Crimp connectors / B-Connectors for replacing switches
Related Articles
Troubleshooting Intermittent or Falsing Zones
Removing Magnetic Door and Window Contacts
Installing Surface-Mount Switches
Installing Recessed Magnetic Switches
Return to main Troubleshooting page from Alarm Switch Troubleshooting
Return to Home Security Systems Answers from Alarm Switch Troubleshooting
Note: Feel free to print any of the articles on this site for personal, non-commercial use. Just look for this button:
If you found this website especially helpful, you might want to consider making a small donation. Since 2011, AzAlarmGuy has been providing free help and advice on home security systems to all of those in need.
Your gift, in any amount, will help me keep this website a free resource for anyone needing help with alarm system issues or questions.
Disclosure
I receive affiliate commissions from some of the companies and products I discuss. These commissions don't change the price that you pay.
Rest assured that this compensation does not influence my recommendations. I only endorse products and services that I truly believe to be an honest value for you, as a visitor to my site.
For more details, see my full disclaimer.
