- Home
- Compare Systems
- Cheap Systems
- Free Quotes
- DIY Systems
- Hardwired Systems
- Wireless Systems
- Smoke Detectors
- Medical Alarms
- Alarm Monitoring
- Cameras & Video
- Ademco
- ADT Security
- Brinks Security
- Broadview
- DSC Security
- FBI Alarms
- GE Security
- Honeywell
- Link Interactive
- Monitronics
- Moose
- Napco
- Protection 1
- Radionics
- Simplisafe
- Alarm Manuals
- Alarm System Parts
- Alarm Tools
- Troubleshooting
- FAQ
- Glossary
- Sitemap
- About Me
- Contact Me
How to Install
a
Small Wall Safe
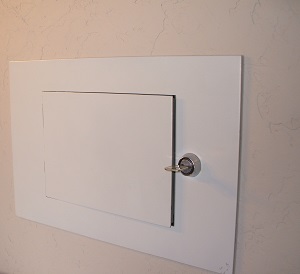
A small wall safe is a convenient, affordable way to securely hide valuables in your home. It will allow you to store cash, jewelry, guns, documents, and many other small items.
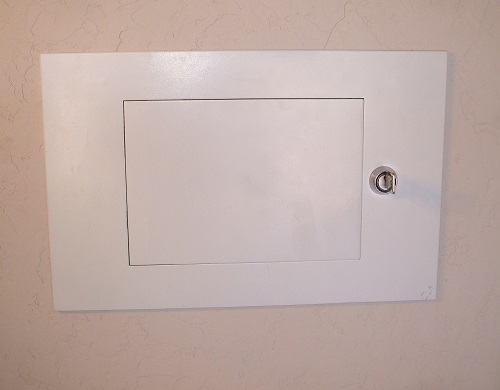
Safes are available in many styles including box safe,
in floor safe, freestanding gun vaults, and more. Safes can even be "bugged" with alarm contacts as part of a custom security system.
This page will focus on a
small, key-operated in wall safe costing under $50. If you’re fairly
handy, installing a safe like this is a great do-it-yourself project.
Much of this page would also apply to other types of small safe, even those using biometric or fingerprint locks.
This
particular wall safe measures roughly 14” by 8-1/2” inside, with a
front flange measuring 17” by 11”. The width of 14-inches is standard
for this type of safe, and isn’t chosen at random. In residential
construction, wall studs are usually spaced 16” apart, center-to-center.
This leaves a space of about 14”, which allows installing the wall safe
between studs.
Some walls will have studs spaced 24” apart; in that case, a short section of 2x4 can be used as a brace (more on that later.)
Making a Template for the Safe
Unless your wall safe came with a template, make one yourself by
tracing the outline of the storage compartment onto a piece of
cardboard. Notice that this is not the front flange of the safe, but the
part that will be recessed into the wall.
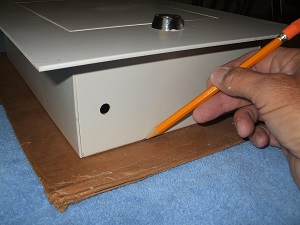
Cut out the template; it will be used to help choose a
location for the safe, as well as to mark an outline for cutting the
opening.
Choosing a Location for a Small Wall Safe
Wall safes for the home should be installed where
they are hidden or slightly concealed, but still easily accessible. Good
choices for hidden wall safes are in bedroom closets and behind doors.
And of course, if it’s convenient to do so, you can hide a wall safe
behind a picture or painting.
Use your template to “test”
possible locations for the safe. Remember to allow an inch or two around
the template for the front flange of the safe.
Avoid locating a
safe in “public” areas, such as a living room or kitchen. These areas
are accessible to any visitors you might have, and would make the
location obvious if you had to access it while they were present.
Also,
check the door swing of the safe you plan to install. Make sure you
have clear access to the inside of the safe when the door is swung open.
If the location is behind a door or in a tight corner and limits your
access, you may be able to simply flip the safe upside down to reverse
the door swing. Many safes have internal shelves that will work in
either orientation.
Check clearance carefully, as described below, before marking or cutting the opening to full size.
If you do encounter an obstacle, patch the hole with drywall Spackle and choose another location.
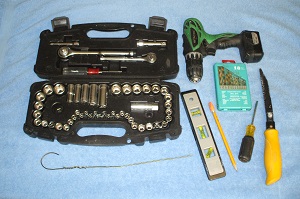
Tools required:
- Metal coat hanger or other piece of stiff wire
- Small screwdriver
- Pencil
- Torpedo level
- Drywall saw
- Drill and wood bits
- Socket wrench set
Checking for clearance
When you’ve picked a likely spot for
your safe, find the approximate location of the studs by knocking on the
wall with your knuckles. As you rap continuously, move back and forth
across the wall. You should hear a slight change in pitch as you move
from a stud to a hollow area.
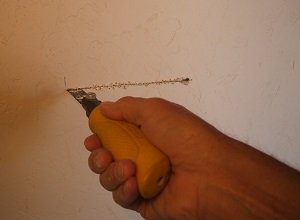
Next, use a small screwdriver to poke a hole through the drywall in the approximate center of the intended wall safe location.
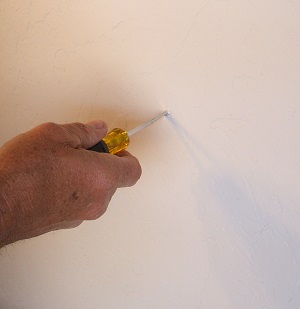
If
the space behind the drywall is hollow, run the screwdriver back into
the hole in all four directions. Try to keep the opening in the drywall
as small as practical.
If the screwdriver hits a stud, poke
holes at very sharp angles to both the left and right.
You should hit open space on one side or the other of a single 2x4 stud.
When you find the open side, check to see if placing the safe on that
side of the stud will work as a good location.
If so, make
another test hole in the approximate center of the new location, and go
to the next step. If not, you’ll need to find another location to
install the safe.
Next, insert the wire into the hole, aiming it
to the left. As the wire hits the stud inside the wall cavity, hold
your thumb to mark the point on the wire where it stops.
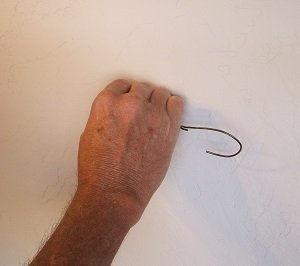
Pull
the wire out, and lay it against the wall to the left. Line up your
thumb to the hole, and make a small pencil mark at the end of the wire.
This is (approximately) the edge of the left stud.
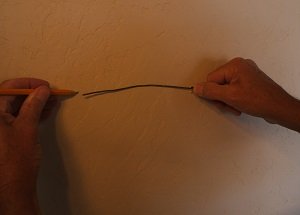
Repeat these
steps for the right side. You now know about where the edges of both
studs are. Measure this length; it should be about 14” if the studs are
spaced the “standard” 16-inches on centers.
Assuming the
space is 14” wide or so, repeat the wire measuring both upwards and
downwards. In most cases, the wall cavity will be wide open for several
feet vertically. If you encounter a block or other obstruction, you can
usually just fudge the safe location up or down to avoid it.
If all is well, proceed to the next step, “Cutting the Hole”. If not, you’ll have to find a different spot to install the safe.
Cutting the Hole
First, make sure the template fits easily between the two stud
markings. Then, use the drywall saw to cut up to the stud on one side or
the other. In this example, we’ll cut to the left stud.
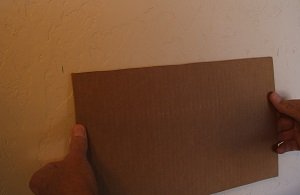
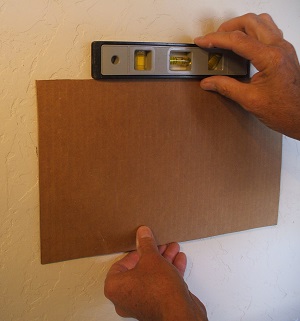
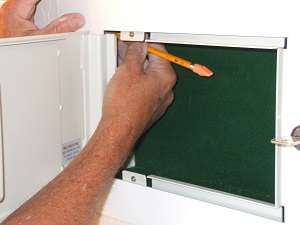
Place the template against the wall, lining up the left side
with the edge of the stud. Level the template, and trace the outline of
the small wall safe template onto the drywall.
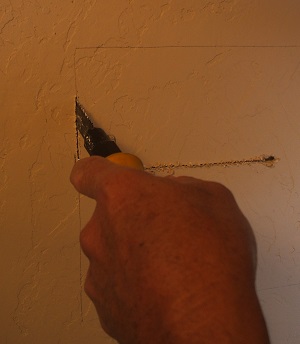
Cut the opening out using the drywall saw, cutting slightly
outside the pencil line. This will allow a little extra wiggle room for
installing the small wall safe.
With the hole cut, test-fit the safe into the opening. If it’s a little tight, shave away the offending edges with the saw.
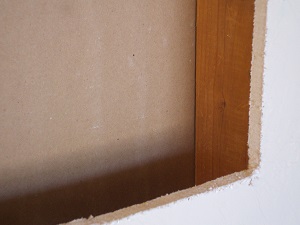
Depending on the framing, there may be a gap between the
hole and the right-hand stud. A small wall safe should be closely supported on
both sides, so we need to provide something solid to take up this
space.
In case of a small gap, use shims or scraps of plywood to
fill in the space. Shims can be screwed to the stud, and stacked as
needed to build out the wood until it’s even with the edge of the
opening.
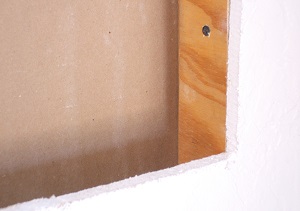
Some homes will have walls with studs spaced at 24”
on-centers. In that case, obtain a piece of 2x4 stock slightly shorter
than the width of the safe opening. Position this inside the opening to
act as a brace for the right side. To make this easier, temporarily
drive a long screw into the brace to act as a handle.
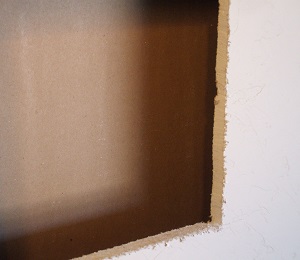
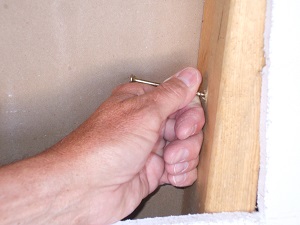
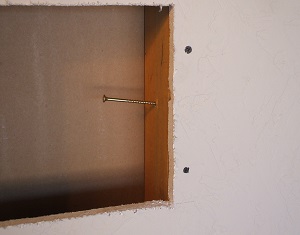
Use drywall screws to hold the brace in place, making sure
to “sink” the heads slightly below the surface of the wall. When the
safe is installed, the outer flange will hide these screws.
Installing the Small Wall Safe
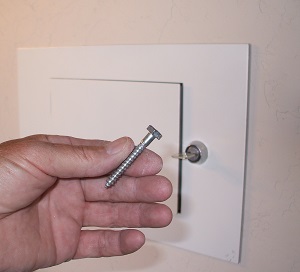
Once the safe fits fully into the opening, mark the studs for
the mounting screw locations. Remove the safe, and drill the holes using
a twist drill bit to match the mounting screws. If you’re installing a
wall safe didn’t include hardware, use ¼” lag screws, at least 2” in
length.
Drill mounting holes with a ¼” drill bit (or whatever size matches the shank of the crews you have.)
Position the small wall safe in the opening, install the screws,
and tighten them most of the way down. Check the safe for level before
tightening the screws down all the way.
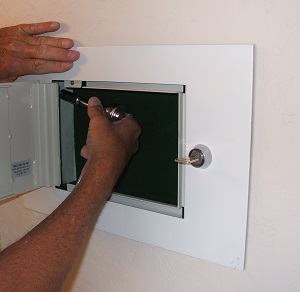
Once installed, you’re ready to stash your small valuables in your new safe.
For key-operated wall safes like this one, which uses a Medeco lock, keep the keys in a secure location.
For a wall safe with combination lock, write the code down and store it in a safe place.
Regardless of the type, avoid accessing your safe in front of visitors.
See a small wall safe at Amazon.com.
Return to Home Security Systems Answers from Small Wall Safe Installation
Return to DIY Home Security Systems from Small Wall Safe Installation
Note: Feel free to print any of the articles on this site for personal, non-commercial use. Just look for this button:
If you found this website especially helpful, you might want to consider making a small donation. Since 2011, AzAlarmGuy has been providing free help and advice on home security systems to all of those in need.
Your gift, in any amount, will help me keep this website a free resource for anyone needing help with alarm system issues or questions.
Disclosure
I receive affiliate commissions from some of the companies and products I discuss. These commissions don't change the price that you pay.
Rest assured that this compensation does not influence my recommendations. I only endorse products and services that I truly believe to be an honest value for you, as a visitor to my site.
For more details, see my full disclaimer.

