- Home
- Compare Systems
- Cheap Systems
- Free Quotes
- DIY Systems
- Hardwired Systems
- Wireless Systems
- Smoke Detectors
- Medical Alarms
- Alarm Monitoring
- Cameras & Video
- Ademco
- ADT Security
- Brinks Security
- Broadview
- DSC Security
- FBI Alarms
- GE Security
- Honeywell
- Link Interactive
- Monitronics
- Moose
- Napco
- Protection 1
- Radionics
- Simplisafe
- Alarm Manuals
- Alarm System Parts
- Alarm Tools
- Troubleshooting
- FAQ
- Glossary
- Sitemap
- About Me
- Contact Me
How to Sharpen Drill Bits
Using a Bench Grinder
There are several ways to sharpen drill bits, and it's a handy skill to have if you install your own hardwired home security system.
Drilling holes for home security devices and alarm wiring will dull your
bits, even if you don’t hit any nails.
This page covers sharpening bits with a bench grinder. To see some other methods, check out The Best Ways to Sharpen Drill Bits.
Bits can be expensive, especially the long drill bits used for security system wiring. Sharpening bits instead of replacing them will not only save you money; it will make drilling faster and easier, since you’ll always have freshly sharpened bits on hand.
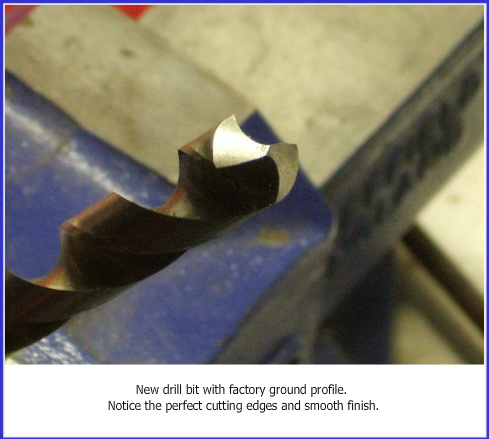
Commercial drill bit sharpeners are available, and many can bring a
dull bit back to almost-new condition. If you’re like me though, you’d
rather not buy a special tool that only does one job. Especially when a
perfectly good drill bit sharpener may already be sitting on your
workbench!
Using an ordinary bench grinder found in many home workshops, you
can quickly sharpen bits free hand. They won’t be as pretty as a brand
new bit, but they will cut like crazy and get you back in action fast.
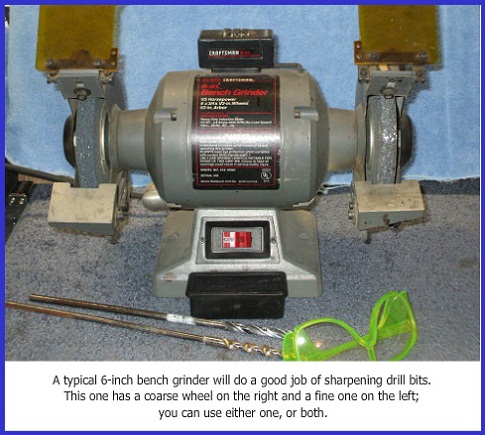
If you already have a commercial drill bit sharpener and know how to
use it, learning the bench grinder method gives you a back-up plan in
case the ready-made unit isn’t available.
Be careful when sharpening drill bits or using any kind of power tool
Although I don’t wear gloves for sharpening drills, I always wear eye protection!
Read and follow all safety information that comes with your bench grinder!
How to Sharpen Drill Bits, Step-by-Step:
Follow these steps to sharpen drill bits on your grinding wheel:
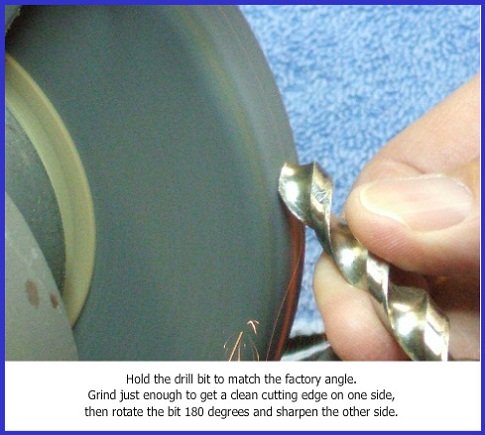
1) Hold the drill bit so that the cutting face is parallel to the
grinding wheel surface. The idea here is to remove only as much metal as
needed to clean up the cutting edge.
2) Slowly bring the bit into contact with the wheel. Keep the bit as straight as possible, without rotating it. We aren’t trying to duplicate the original curvature of the factory grind. Instead, we’re making a new, flatter cutting face.
3) The heel portion of the cutting face should be ground slightly
more than the edge. This will cause the cutting edge contact the
drilled surface first, when in use.
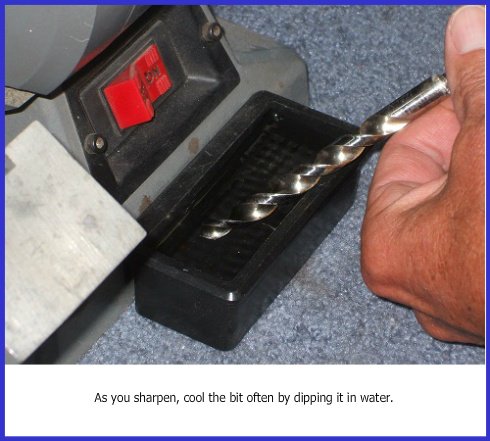
4) When you sharpen drill bits, metal is removed and the steel will
begin to heat up. Dip the bit into water frequently to keep it cool. If
it gets too hot to hold in your bare hand, you’re either grinding too
fast or not dipping and cooling often enough.
5) As soon as the cutting edge is sharp, spin the bit half a turn, and begin sharpening the other cutting face. The more evenly you can grind the two edges, the better the bit will perform.
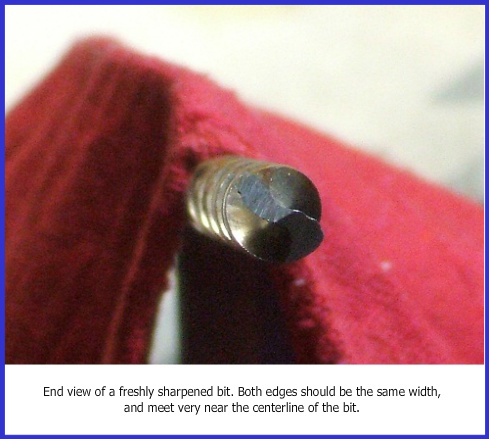
6) When you’ve got both edges sharp, check to see if they are the same width. Look at the drill end-on. The two cutting edges should almost meet to form a point in the center of the bit diameter. There will be a short line centered between the two. If not, no problem; just grind a little more on the wider side until the two even up.
Are both edges sharp, the same width, and centered?
Good!
For a quick check, hold the tip of the bit against a piece of scrap wood
and simply turn it slowly by hand (Clockwise, please). A properly
sharpened bit will easily begin making a hole, even with very little
pressure.
For a real test, chuck the bit into your drill. Try drilling into
a piece of wood pushing just enough for the bit to “bite”. The bit
should bite into the wood without you having to force it. After drilling
an inch or two, pull the bit back out. It should send chips flying.
Does your bit pass the test? Congratulations! You’ve just
sharpened your first drill bit! You’ll now be able to sharpen drill bits
countless times before they have to be replaced.
If you do a lot of drilling, the money saved this way alone might well cover the cost of the bench grinder.
If the bit doesn’t cut very well, you may have ground too heavily
on the edge, versus on the heel. Try regrinding at a steeper angle, so
that the heel is formed “behind” the cutting edge.
It may help to think of a drill bit as two chisels, attached at angles to each other and rotating to create a hole.
When we sharpen drill bits, we're just putting an edge back on each of these “chisels”.
A 6- or 8-inch grinder is the perfect size for sharpening drill bits.
If you already own one, great! If not, consider getting one. They
aren’t expensive, and can be used for many other sharpening chores and
household projects.
Many bench grinders come with two stone wheels installed, one
coarse and the other fine. You can use either or both wheels to sharpen
drill bits. I tend to use the fine stone for bits that are just a little
dull, and the coarse wheel for bits that are in really bad shape.
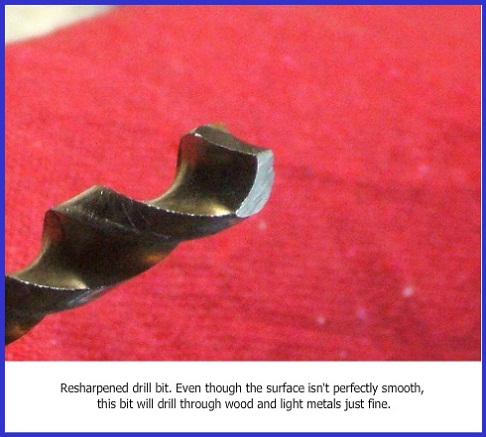
Drilling with Resharpened Drill Bits
Drill bits sharpened with a grinder work best for drilling wood or
thin metal. The aggressive angle of the point won’t work as well in hard
or thick steel. Since most alarm wiring is run through drywall and wood
framing, this isn’t a problem.
For drilling thick metal, like lintels in masonry homes, I still prefer to use new bits. The perfect point on a fresh bit makes starting holes easy, without the bit “walking” around too much.
A tip to keep your bits sharp: Clear the chips often as you drill.
Drill an inch or two, then pull the bit back out until the wood
shavings fall away from the flutes. If you don’t do this, chips will
become packed into the flutes, creating a lot of heat. Running a
drillbit while very hot will dull it faster, and is more work for you!
If you must drill very hard wood, keep a cup of water nearby.
Dip the bit into the water for a few seconds each time you pull
it out to clear the chips. This will keep the bit cooler, and you won’t
have to sharpen drill bits as often.
Here’s another tip to help increase the time between sharpenings:
Start holes using a new or like-new drill bit.
Once the hole is started, switch to one of your resharpened drill bits
(It helps to have two drill motors for this). This is even more
important if you know the bit will be running into masonry.
Switching bits this way keeps your best bits sharp longer, and the ones you’ve sharpened before are easier to re-grind again.
If you happen to break a long drill bit, don’t throw the shaft
away. The long shank can be used to fish alarm wiring, “feel out” a path
for a fish tape, or check the depth of a hole while drilling.
If you’ll be using long drill bits for drilling doors, check out
How to Use Long Drill Bits for Alarm Wiring in Doors
If you want to see some drilling techniques for flexible drill bits, have a look at
Using a Flexible Drill Bit the Right Way
If you haven't done so already, get a few Free Home Security Systems Quotes from companies in your area.
This will give you a good idea of what it would cost to have a system installed, as well as how much you could save by doing it yourself.
Return to Home-Security-Systems-Answers from How to Sharpen Drill Bits Using a Bench Grinder
Return to DIY Home Security Systems from How to Sharpen Bits Using a Bench Grinder
Note: Feel free to print any of the articles on this site for personal, non-commercial use. Just look for this button:
If you found this website especially helpful, you might want to consider making a small donation. Since 2011, AzAlarmGuy has been providing free help and advice on home security systems to all of those in need.
Your gift, in any amount, will help me keep this website a free resource for anyone needing help with alarm system issues or questions.
Disclosure
I receive affiliate commissions from some of the companies and products I discuss. These commissions don't change the price that you pay.
Rest assured that this compensation does not influence my recommendations. I only endorse products and services that I truly believe to be an honest value for you, as a visitor to my site.
For more details, see my full disclaimer.


