- Home
- Compare Systems
- Cheap Systems
- Free Quotes
- DIY Systems
- Hardwired Systems
- Wireless Systems
- Smoke Detectors
- Medical Alarms
- Alarm Monitoring
- Cameras & Video
- Ademco
- ADT Security
- Brinks Security
- Broadview
- DSC Security
- FBI Alarms
- GE Security
- Honeywell
- Link Interactive
- Monitronics
- Moose
- Napco
- Protection 1
- Radionics
- Simplisafe
- Alarm Manuals
- Alarm System Parts
- Alarm Tools
- Troubleshooting
- FAQ
- Glossary
- Sitemap
- About Me
- Contact Me
How to Install a
Magnetic Door Switch
Surface-Mount Type
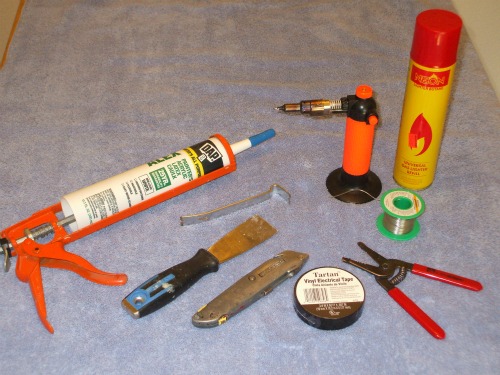
Installing common alarm contacts like the magnetic door switch shown here is not a very difficult job. A type of magnetic reed switch, these surface mount devices sense the opening of a sliding door or window. Here’s how to install one using a few simple tools.
Click here for information on installing recessed switches.
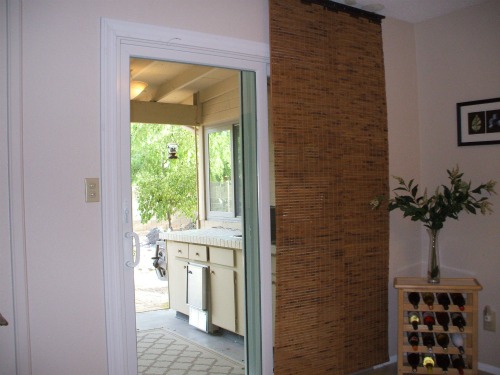
Activate the alarm system’s “Chime” feature, to make it easy to test the alignment of each switch and magnet. The chime will sound a tone when the switch triggers on opening. Some brands, like DSC home security systems, also sound a tone on switch closure.
The chime function is very handy for many DIY home alarm system
projects, since you know exactly when a sensor trips without being
near a keypad display.
If doing it yourself just isn't your speed, let the pros do the work!
Click the "Next" button below to get free, no-obligation price
quotes from dealers in your area.
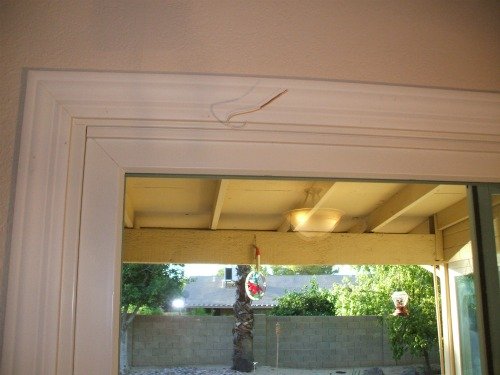
Make sure the wire has been brought out in the right location by the
installers. It should be near where the edges of the fixed and
movable frames meet, so the switch and magnet will be next to each
other.
Surface-mount alarm contacts can be mounted at the side of an opening, but the top is preferable on sliding doors. This is because slamming the door hard will sometimes sheer off a surface-mounted magnet at the side.
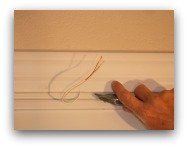
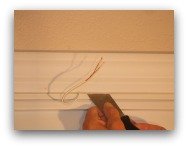
Use a razor knife to score the paint and/or caulking where the trim meets the frame. This will make it easier to pull the trim free of the frame, and leaves a cleaner edge. Then use a putty knife to gently pry the trim up, creating a gap to feed the wires into later. Pry in several places along the trim, a little at a time, to avoid splitting the wood.
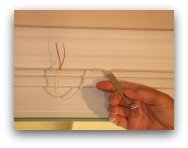
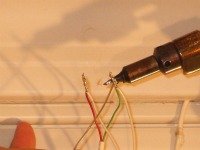
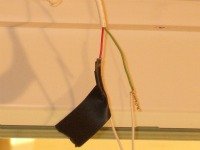
Magnetic Door Switch with Flying Leads
Prepare the wires and leads for splicing by stripping back a few inches of outer jacketing. Then remove about ½” of insulation from each individual wire.
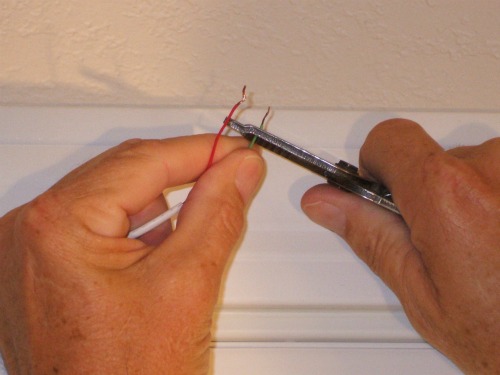
Next, twist the bare copper conductors together, one wire to each lead. Finish the splices with a crimp connector on each joint, or solder the connections, whichever you prefer. For the soldered joints shown here, use only rosin core solder, and insulate each finished joint with electrical tape.
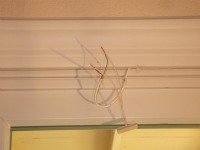
Magnetic Switch with Solderless Terminals
Strip back the outer jacket about ½” or so. Then strip each wire so about 1/8” to 3/16” of bare copper is exposed.
Insert one wire into each terminal and tighten firmly. Don’t go “gorilla” on them, or you may strip the threads. Just get them snug enough that they can’t be pulled out accidentally.
Mounting the Magnetic Door Switch
Choose the final location for the sensor, clean the frames of any grease or dirt. Peel and stick the sensor in position.
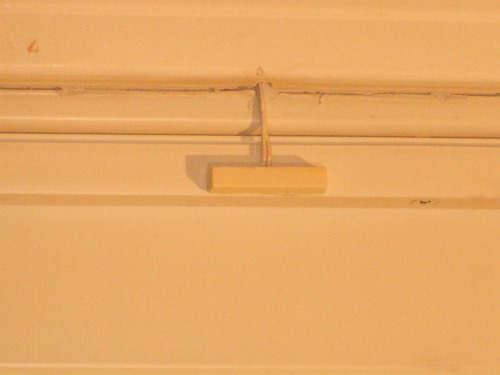
Tuck the wiring up behind the trim. If there is a space left around the doorframe where it fits into the rough opening, the wires can rest nicely there. If there isn’t room, notch out some of the drywall to make space.
Make enough room for the wires to sit flush with the face of the doorframe. Otherwise, the wiring could get pinched and damaged when you put the trim back in place. Be sure the drywall you gouge out will be covered by the trim!
Tap the trim piece back down using your fist, the end of a rubber
hammer handle, or something similar that won’t mar the wood. A few
additional fishing nails may be needed to hold the trim in place.
Run a bead of caulking along the joint, smoothing it in with a finger. Caulking can also be used to fill any nail holes or scratches in the wood.
Mounting the Magnet
Open and close the door firmly a couple of times, then close and latch it. Push the door from side to side with the latch engaged, to see if there's any play. There shouldn’t be more than a quarter-inch or so. If there is, the latch will need to be adjusted. Installing a magnet on a sloppy door is a recipe for false alarms!
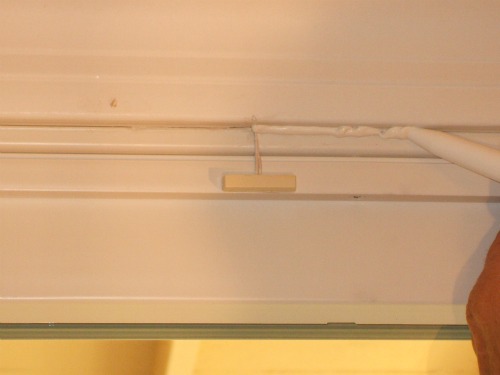
Peel the backing from the magnet, and stick it in place parallel and even with the switch.
These pictures show the right and wrong ways to install the magnet:
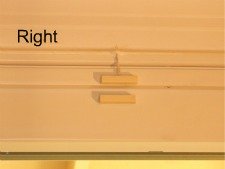
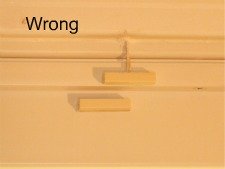
Operate the door a few times, listening for the chime tone to confirm that the alarm panel “sees” the door open and close. When all is working, apply a small bead of caulking to the magnetic door switch and magnet. This will hold them in position if the sticky tape ever fails.
Venting
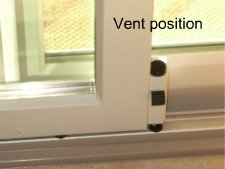
Sliding openings allow you to use a trick called “venting”. This lets you open a door or window to a specified point, usually about 6” or so, and still arm the security system. This allows for extra ventilation and fresh air in pleasant weather.
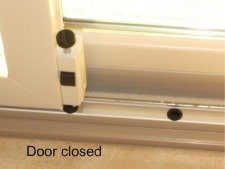
To vent an opening, first install a pinning device to keep the door or window at the vent position. Then, mount a second magnet in alignment with the magnetic door switch. This “fools” the alarm system into thinking that the door is closed.
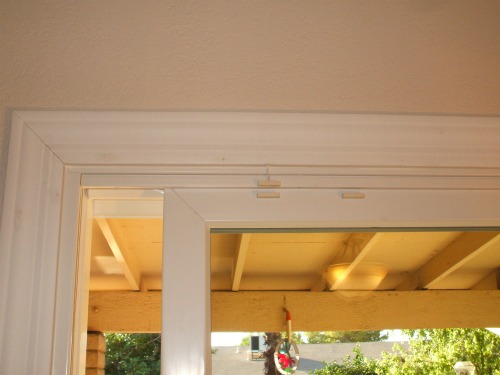
Many newer doors have built-in pinning latches or foot bolts just for this purpose. Older doors and windows can be pinned and vented using latch kits, available at most home improvement centers. Always use some sort of pin or bolt latch when venting an opening. Otherwise, moving the door or window after the security system is armed will cause a false alarm.
For tips on the best ways to plan for venting, see Burglar Alarm Wiring for Securing Doors.
See how a vent zone can be just one of many Custom Security System Features.
For some examples of available window and door sensors, see this page on Honeywell Switches.
Get help with installing recessed magnetic switches.
Connecting a Garage Door Contact to a Home Security System.
The Best Overhead Door Contact Mounting Locations
Return to Home-Security-Systems-Answers from Magnetic Door Switch-Surface-Mount Type
Return to DIY Home Security Systems from Magnetic Door Switch-Surface-Mount Type
Note: Feel free to print any of the articles on this site for personal, non-commercial use. Just look for this button:
If you found this website especially helpful, you might want to consider making a small donation. Since 2011, AzAlarmGuy has been providing free help and advice on home security systems to all of those in need.
Your gift, in any amount, will help me keep this website a free resource for anyone needing help with alarm system issues or questions.
Disclosure
I receive affiliate commissions from some of the companies and products I discuss. These commissions don't change the price that you pay.
Rest assured that this compensation does not influence my recommendations. I only endorse products and services that I truly believe to be an honest value for you, as a visitor to my site.
For more details, see my full disclaimer.


