- Home
- Compare Systems
- Cheap Systems
- Free Quotes
- DIY Systems
- Hardwired Systems
- Wireless Systems
- Smoke Detectors
- Medical Alarms
- Alarm Monitoring
- Cameras & Video
- Ademco
- ADT Security
- Brinks Security
- Broadview
- DSC Security
- FBI Alarms
- GE Security
- Honeywell
- Link Interactive
- Monitronics
- Moose
- Napco
- Protection 1
- Radionics
- Simplisafe
- Alarm Manuals
- Alarm System Parts
- Alarm Tools
- Troubleshooting
- FAQ
- Glossary
- Sitemap
- About Me
- Contact Me
How to Use Long Drill Bits for Alarm Wiring in Doors
Drilling holes for a wired home security system requires long drill bits, and a few other special tools. These are needed to run a wire to each opening, so that hardwired contacts can be installed.
Before starting any project involving drilling, please read this DIY Disclaimer.
Long Drill Bits & Tools Required
If you’re installing your own security system and don’t have a lot of
openings, you can scale this list back quite a bit. If you have lots of
windows, or you think you might want to do this as a career, try to get
as many of these items as possible.
If your doors are already wired, see how to set switches in these articles:
Installing Magnetic Door Switches - Recessed Type.
Magnetic Door Switch Installation - Surface-Mount Type.
Variable-Speed Reversible (VSR) Corded Drill with ½” Chuck
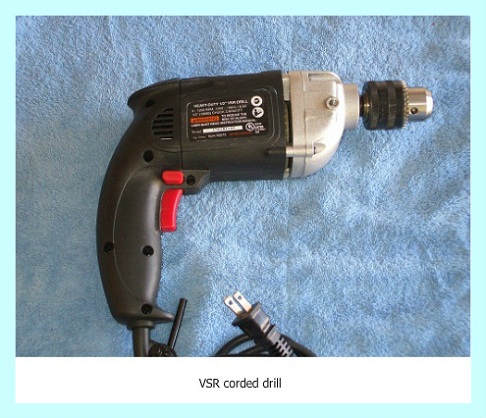
This type of drill will handle 95% of the drilling chores you might run
into. It has plenty of power to run long drill bits, but is still small
enough to handle easily. If you expect to run into brick, block, or
other masonry, spend a little more for the hammer drill feature.
Cordless Drill
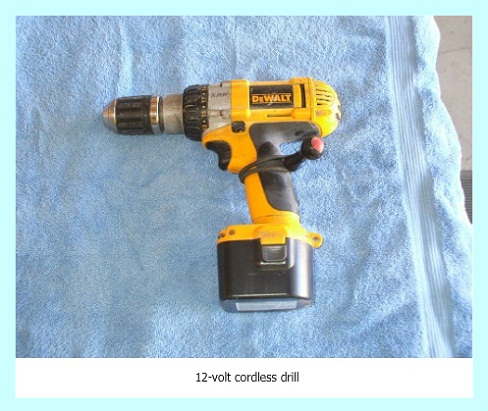
This is the ideal tool for drilling small, shallow holes for door
magnets, plastic anchors, screws, etc. Cordless drills are also perfect for
driving screws.
Cordless drills are not the best tool to use with long flex bits. Long bits can put quite a load on a drill, and battery-powered drills don't have the horsepower to do this for many holes.
If you're only drilling a few holes, or have a second battery and plenty of time to let it recharge, a cordless unit can be adequate.
Steel Drill Bits
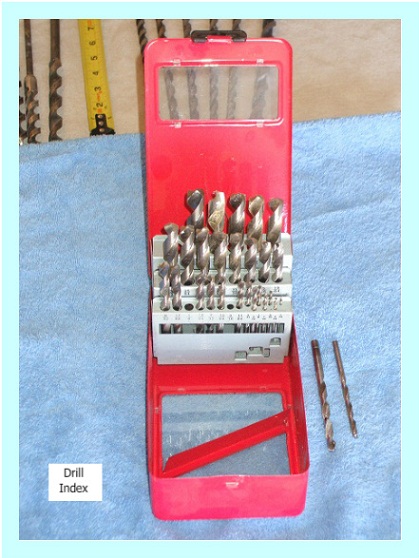
Often sold in a drill bit index, or set, these are basic tools for many
jobs. For alarm installation, they are the best types of drill bits when
making holes for magnets. They are also perfect making pilot holes for
long drill bits.
Drill bit sizes for typical alarm work are 3/8” and ¼”
for running wires, and 1/8” and 3/16” for pre-drilling holes for screws
and plastic anchors.
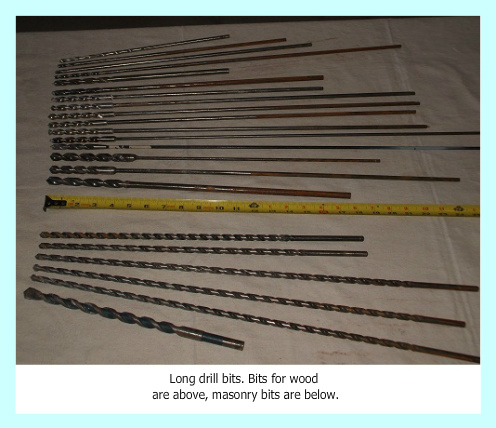
Long Drill Bits
Also called bellhanger bits, flexible bits, or “flex” bits, long drill
bits are sold in various sizes.
A good selection would include lengths from 12 inches up to 4, 5, or 6 feet, depending on the type of house.
The most useful diameter is 3/8-inch, since this matches the size of standard hardwire contacts. A few ¼-inch bits, 12 to 24 inches in length, are also good to have.
Click here to shop for drill bits at Amazon.com.
Long masonry drill bits would only be needed if you have to drill through block or brick. This can usually be avoided, since most masonry walls are furred-out with wood nailing strips.
Grinding Wheel or Drill Bit Sharpener
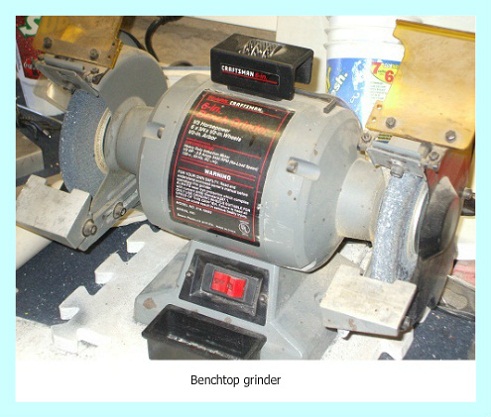
Drill bits will obviously get dull with use, especially during
encounters with masonry, nails, and steel brackets hidden in walls.
There are many ways to sharpen drill bits. Commercial drill bit sharpeners are available, or you can use a standard bench grinder for sharpening drill bits.
See how it's done here: How to Sharpen Drill Bits Using a Bench Grinder.
If you don't have space for a bench grinder or prefer not to use one, there are other methods. Check out The Best Ways to Sharpen Drill Bits.
For tips on using your bits, check out Using a Flexible Drill Bit the Right Way.
Drop Cloths
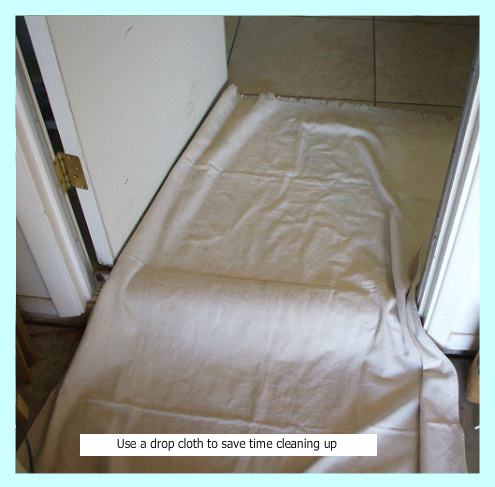
While not strictly a tool, using drop cloths, towels, or old bed sheets
to catch the drilling mess is quick, easy, and cheap. If you’re working
on your own house, it will save you lots of cleanup time. If you’re
doing this for someone else, your efforts at neatness will likely be
greatly appreciated.
Using Long Drill Bits
I always try to drill along the midline of the door frame thickness.
This means that later, I can drill for the magnet along the midline of
the door itself. This just makes it easier to line the switch and magnet
up, without thinking too much.
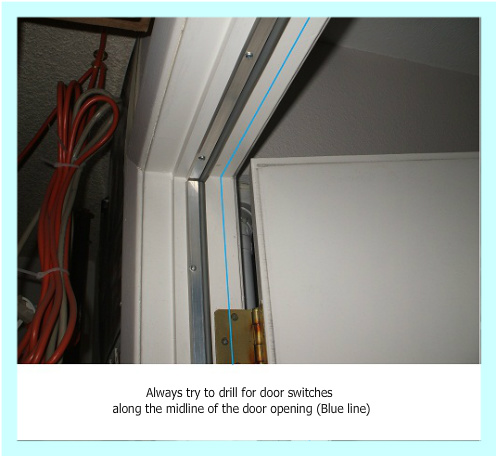
Begin by drilling a 3/8” hole in the doorframe, where the switch will be located.
Starting a hole with a flexible drill bit longer than 36- or 48-inches is difficult. I usually begin drilling with a regular bit, which is much easier to control. Then, I switch to the long drill bit after I’ve got the hole started. Doing it this way also starts the hole aimed in the right direction.
As you drill, tilt the drill bit shank at a slight angle pointing
toward the middle of the wall thickness. Try to imagine you’re “aiming”
the bit at a point inside the top of the wall. This helps insure you
don’t accidentally pop out of the drywall with the bit.
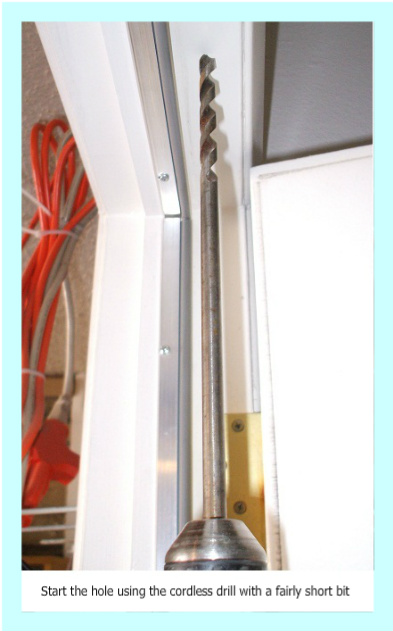
While drilling, pull the bit back out of the hole often, to clear the
cutting head of wood chips. I usually do this about every inch or two
of drilling progress, more often for harder wood. Slower is better when drilling! Clearing chips often will keep drillbits, the motor, and you from working as hard.
Checking the Drilling Depth
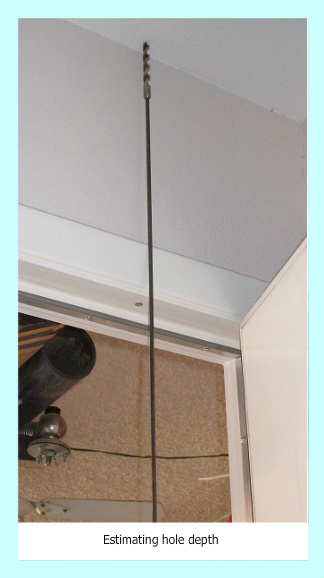
Check the approximate depth the drill bit will have to go to reach
attic space.
Do this by holding the tip of the bit against the ceiling, and seeing where the doorframe lines up with the drill bit shank. You’ll have to drill that far, plus the thickness of the top plate to reach the attic.
If at any time you drill past that point without
hitting an empty space, you’ve probably hit a rafter.
It’s important to keep track of how deep you’ve drilled. If you hit a
rafter and continue drilling, you could wind up going through the roof!
Instead, back the drill out, and start a new hole a few inches left or
right of the first.
After the drillbit goes through the doorframe, you’ll feel it hit the hollow section of the wall. If you drill several inches and don’t feel the bit hit space, you may have hit a stud. Back the drill out, and begin a new hole a few inches away from the first.
Reversing the drill
Once you reach the hollow part of the wall, you’ll be going through insulation. Reverse
the direction of the drill motor. If you continue with the drill
spinning in the forward direction, the bit will grab the insulation, wind it up into a ball, and could break your bit.
Reversing the drill also makes it very unlikely that you’ll damage any electrical wiring that may be present.
Press the trigger and run the drill slowly, while pushing upward.
This will allow the bit to “tunnel through” the insulation. Try to keep
the drill headed in the direction you started in, toward the center of
the top plate.
Keep pushing until you feel the bit hit the top plate. Tap the drillbit into the top plate firmly a couple of times, to make a starting “divot” in the wood. Switch the drill motor back to forward rotation.
Drilling through the top plate
With the drill running forward again, use gentle pressure to start drilling the top plate. This gentle pressure will reduce the chance of the bit “walking” sideways across the bottom of the plate. Drill just as you did for the door frame, clearing chips every inch or so. (To clear chips at this stage, you only have to back the drill out far enough to clear the bottom edge of the top plate. The chips will fall into the hollow of the wall). After drilling through the top plate, you should feel the hollow space of the attic.
Long drill bits are great for checking hole depth. Retract the
bit you’re drilling with, then send another one up the hole by hand,
shank-first. By angling it around slightly, you should be able to
retrace the path of the hole all the way into the attic space. Be
careful not to cut your hands on the sharp drill flutes!
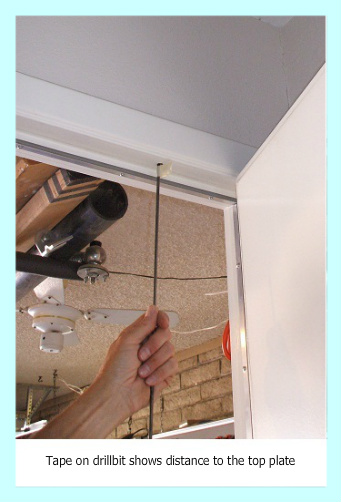
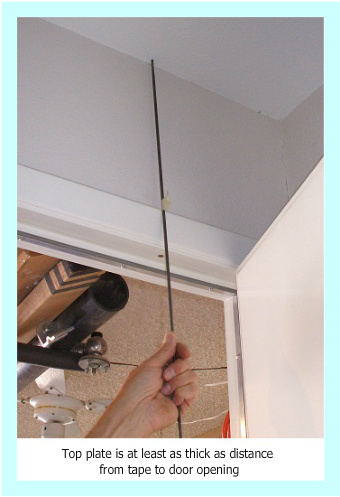
Reduced shank drill bits usually have a shaft diameter of around 3/16”, so they will run easily through a 3/8” opening.
After you feel your bit enter attic space, continue pushing it up until you feel the bit hitting the roof plywood. Notice how much of the drill bit is exposed; this gives you a good gauge for drilling the rest of the openings.
Congratulations! You’ve finished drilling this door, and can move on to the next. After completing all the doors, you’ll be ready to fish wires to each opening. See how it's done on these two pages:
Using a Fish Tape to Install Home Alarm Wiring explains how to run a fish tape up into the attic from each alarm device.
Fishing Wires for a Home Security System shows what's involved in running wires from the main alarm panel, through the attic to the waiting fish tape.
If you haven't done so already, get a few Free Home Security Systems Quotes from companies in your area.
This will give you a good idea of what it would cost to have a system installed, as well as how much you could save by doing it yourself.
Return to Home-Security-Systems-Answers from Using Long Drill Bits for Door Alarm Wiring
Return to DIY Home Security Systems from Using Long Drill Bits for Door Alarm Wiring
Note: Feel free to print any of the articles on this site for personal, non-commercial use. Just look for this button:
If you found this website especially helpful, you might want to consider making a small donation. Since 2011, AzAlarmGuy has been providing free help and advice on home security systems to all of those in need.
Your gift, in any amount, will help me keep this website a free resource for anyone needing help with alarm system issues or questions.
Disclosure
I receive affiliate commissions from some of the companies and products I discuss. These commissions don't change the price that you pay.
Rest assured that this compensation does not influence my recommendations. I only endorse products and services that I truly believe to be an honest value for you, as a visitor to my site.
For more details, see my full disclaimer.

