- Home
- Compare Systems
- Cheap Systems
- Free Quotes
- DIY Systems
- Hardwired Systems
- Wireless Systems
- Smoke Detectors
- Medical Alarms
- Alarm Monitoring
- Cameras & Video
- Ademco
- ADT Security
- Brinks Security
- Broadview
- DSC Security
- FBI Alarms
- GE Security
- Honeywell
- Link Interactive
- Monitronics
- Moose
- Napco
- Protection 1
- Radionics
- Simplisafe
- Alarm Manuals
- Alarm System Parts
- Alarm Tools
- Troubleshooting
- FAQ
- Glossary
- Sitemap
- About Me
- Contact Me
Using a Fish Tape
to Install Home Alarm Wiring
The Security Technician on the Ground
This page explains how to use a fish tape to run alarm wiring in a house with a pitched roof, and having some kind of attic access or “scuttle hole”. If you’re a homeowner installing a DIY alarm system, this will likely be brand new information for you. If you’re an alarm professional, this may give a fresh spin on using a tool you already know well.
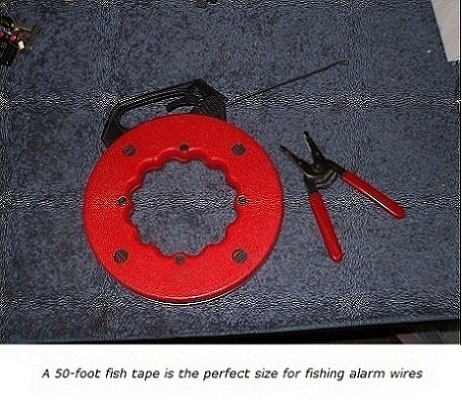
Fish tapes like the one shown are available at home improvement centers, as well as online.
Here I’ll focus on the techniques used by the ground man handling the fish tape.
For details on the job of the “attic rat”, check out Fishing Wires for a Home Security System.
If you’re working alone and doing both parts of the job, alternate between these two pages as needed.
Before you can start fishing wires, all of the door and window openings need to be drilled. To see how to do this, check out How to Use Long Drill Bits for Alarm Wiring in Doors.
Plan the Alarm Wiring Runs
Decide how many wires to include in each pull across the attic. Group wires according to their location in the house, and how they can best be reached from the attic. For average size homes around 2,000 to 3,000 square feet, this will mean pulling 3-6 wires at a time, give or take, and will involve several trips to reach all the devices in the system.
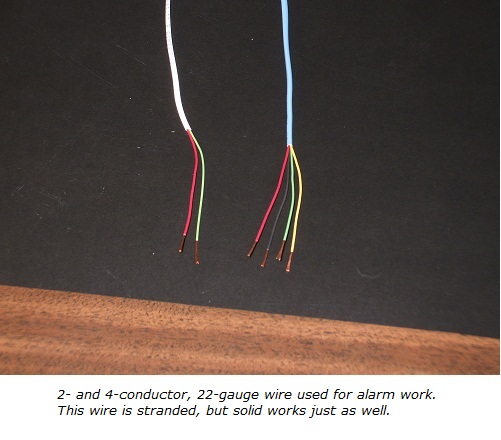
Use 22-gauge, 2-conductor wire for door and window openings, and 22-gauge 4-conductor for keypads, motion detectors, and smoke detectors. Sirens can also use 22/4. For alarm work, you can use either stranded or solid copper wire.
Hand the wire ends for the first pull up to the “attic rat”. He can then begin heading to the first openings to be wired, while you start sending the fish tape up.
Using the Fish Tape
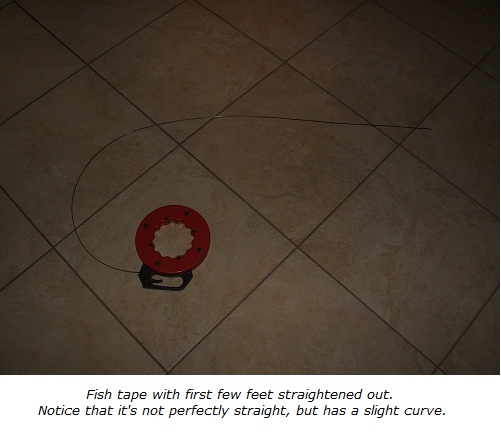
Begin by straightening out the first several feet of the fish tape. It should be fairly straight, but still have a bit of its original curve to it. Start sending the tape up the hole in the door or window frame.
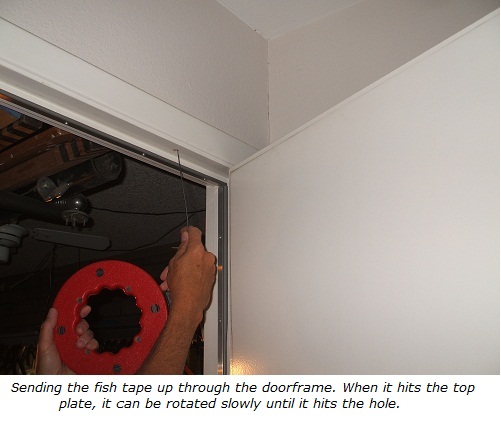
If you hit insulation, bounce the tape up and down gently to work your
way through it. If that doesn’t work, withdraw the fish tape and run a
long drill bit up the hole, shaft-first (backwards). This should plow
out a path for the tape, and allow it to reach the top plate of the
wall.
When you hit the top plate with the tape, spin it slowly while also moving the tape up and down gently. Continue to tap lightly against the top plate, until you turn it to the right angle to hit the hole. This is a learned skill, and takes some patience. You may have to pull the tape back out and re-straighten it to get it to line up with the hole.
Tip:
I’ve found that fish tapes don’t have to be perfectly straight to do the job.
If you can’t get it through the hole after several attempts, try bending a slight curve into it.
This often gets it to go on the very next try.
After the fish tape "finds" the hole, push it further until it reaches
the roof sheeting. Now, twist the fish tape handle so that the blade is
curving toward the center of the house. Continue pushing, while feeling
for any resistance. This will cause the blade to follow the roof
sheeting, and make it easier for the attic guy to reach without crawling
for it.
So, how do you know when you’ve reached the attic? Easy! Just run the tape (or a glowrod or drill shaft) up as far as it will go. Then, mark it at a point even with the top of the window or door frame using a Sharpie or a piece of electrical or masking tape.
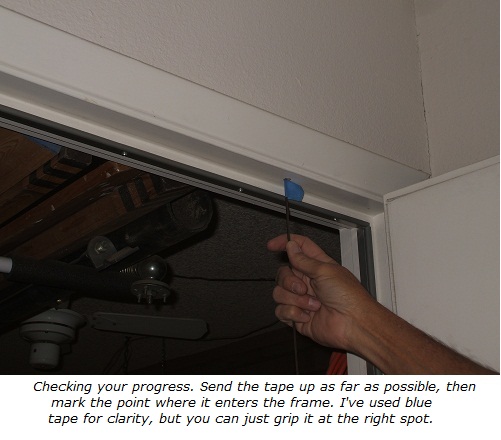
Pull it down, and hold it against the wall. Place the tip against the ceiling; if the mark is above the doorframe, you haven’t reached the attic. Run the blade back up, then work it around until the masking tape mark enters the hole. Then you’ll know for sure that you’re above the ceiling and into the attic.
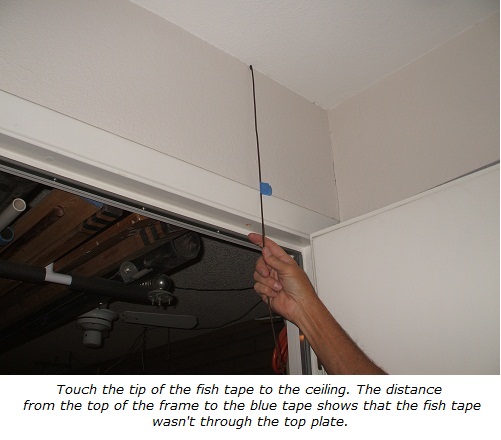
Sometimes the end of the tape will hit the roof plywood and hang up, especially with a very shallow-pitched roof. If this happens, bounce the tape up and down very firmly. This will usually make the end of the tape spring just enough to make the turn. It helps if you didn’t straighten the blade out too much in the beginning. If there just isn’t enough space for the blade to make the turn by pushing on it, the attic rat may have to help it along using a hook.
Once into the attic space, send up several feet of fish tape. This will let the attic person grab it easily, without having to dive all the way to the outside wall. If the blade curls and is unreachable, you’ll need to pull it back out, straighten it if needed, and re-send it.
All of this may seem very difficult, and it can be at times. Trust me, though; it will get easier after you’ve done a few openings. You’ll develop a feel for how hard to push, how much bend to put in the tape, and how to rotate the tape to hit the hole.
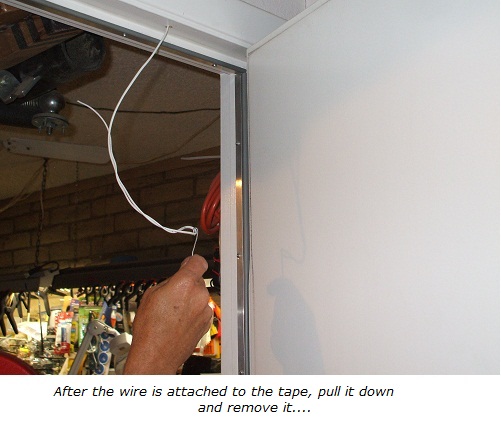
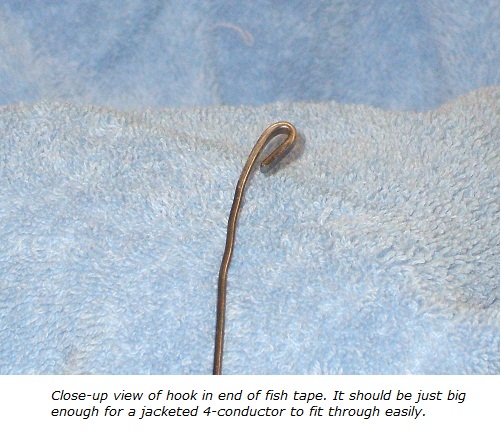
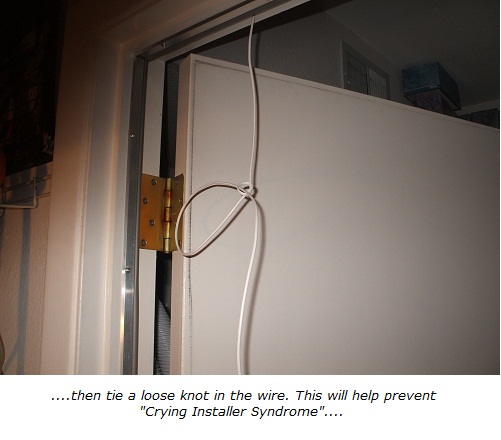
When the attic person signals that the wire is attached, pull the tape down and out of the hole. Untwist the alarm wire from the eye of the tape, and tie a loose slipknot in the end of the wire.
Don’t forget to do this!
It’s very common during attic work for loose wires to get pulled back accidentally, as other wires are run. The loose knot will keep this from happening, and can easily be untied after the switch has been connected to the wire.
Wind up the excess length of tape using the handle. Do this after fishing each wire, leaving just a few feet of tape coming out of the case. This will make it easier to move to the next opening, and a short length of tape allows better control.
After a pull has been completed, go back to the main panel location. Pull enough slack from the boxes or spools to reach the panel box location, plus several extra feet for a service loop. Cut the wires off at the desired length, and tie them off loosely to keep them from being pulled back up along with the next bundle.
If you’re pulling wires from the scuttle hole, you can just tie them to the ladder being used to reach the attic. Otherwise, they can be tied or wrapped around a doorknob, coat hanger rod, or any other stationary object.
Gather the ends of the wires for the next pull, and hand them up to the attic rat. Head for the next door or window opening, and repeat the process. As you go, keep track of which openings have been wired, and which are coming up next. Part of your job is to do most of the thinking, leaving the attic rat free to concentrate on navigating around the crawlspace.
Finishing at the Main Alarm Panel
After all the alarm wiring has been run, double-check by counting the wires at the main alarm panel area. This should match the total number of doors, windows, keypads, smoke detectors, etc. Now is the time to discover that you’ve missed an opening, not after the attic has been closed up! If any wires are missing, hand them into the attic and fish them down to their locations.
When all the wires have been run, gather the ends into a bundle and feed them down at the main alarm panel location. Ideally, the panel location is in an uninsulated wall, and the wires will drop down easily. If not, you may have to send the fish tape up, tape the bundle on, and pull it down.
When all the attic work is done, close the scuttle lid and let the attic rat take a break. You can begin setting switches, mounting the main alarm panel, etc.
Click this link for more information on Choosing Fish Tapes for Home Alarm Wiring. This page also includes tips on how to bend a new hook in the end of a tape.
If you haven't done so already, get a few Free Home Security Systems Quotes from companies in your area.
This will give you a good idea of what it would cost to have a system installed, as well as how much you could save by doing it yourself.
Related Article
Fishing Wires for a Home Security System
Choosing Fish Tapes for Home Alarm Wiring
Return to Home-Security-Systems-Answers from Using a Fish Tape to Install Home Alarm Wiring
Return to DIY Home Security Systems from Using a Fish Tape to Install Home Alarm Wiring
Note: Feel free to print any of the articles on this site for personal, non-commercial use. Just look for this button:
If you found this website especially helpful, you might want to consider making a small donation. Since 2011, AzAlarmGuy has been providing free help and advice on home security systems to all of those in need.
Your gift, in any amount, will help me keep this website a free resource for anyone needing help with alarm system issues or questions.
Disclosure
I receive affiliate commissions from some of the companies and products I discuss. These commissions don't change the price that you pay.
Rest assured that this compensation does not influence my recommendations. I only endorse products and services that I truly believe to be an honest value for you, as a visitor to my site.
For more details, see my full disclaimer.
